
Summer is just beginning, but fall is on our minds. Cooler weather, pumpkin spice, and family togetherness are drawing us in. As we consider all we have to look forward to, let's not overlook the little things we tend to take for granted.
Things like the bread on our tables every day, and the love that we share with family and friends, are blessings from God that are sometimes simply expected to be there all the time. It's not until we lose something or someone that we realize how important they are to us in our daily lives.
Matthew 16:11 is a portion of the Lord's prayer that reminds us that we should be thanking God for our food as well as asking Him to continue to provide for us daily. It may sound like a lecture from your mother when she told you to "clean your plate" as a child, but there really are people who struggle to feed their families. Through no fault of their own, they have found themselves in a position of financial need, or, perhaps, they simply live in a place with too many people and not enough food. Either way, we are blessed to be able to get up in the mornings and not have to worry about what we and our children will eat today. For that we should be always thanking God and praising Him for His continued blessings on us.
In another passage of scripture, John 6:35, however, Jesus tells us that he is "the bread of life," and that no one who comes to him and believes will ever hunger or thirst again. Obviously, Jesus is not saying that we will never need to eat or drink again on this earth. That would be ridiculous. Even Jesus got hungry and thirsty while he was here. This verse is simply telling us that we will never again feel the emptiness of life without him. We will never have the need to search for that missing piece, because he will fill our spirit with everything we ever felt we needed.
What wonderful thoughts!! These are messages we should be shouting from the rooftops! However, they are also messages that we need to hide in our hearts so that we can pull them out and cling to them when times get hard, or we start feeling down.
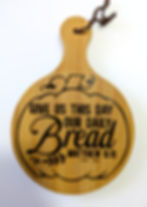
With that in mind, I created some designs for some mini charcuterie boards I found while out shopping at my local craft store (you can find the link for them below)!
Disclaimer: This blog post contains affiliate links. I may earn a small commission to fund my coffee drinking and crafting habit if you use these links to make a purchase. You will not be charged extra, and you’ll keep me supplied in caffeine and future plots and plans! It’s a win for everyone, really! (See my full disclaimer here.)
Supplies:
Mini Charcuterie Boards (I used a round one, but they are available in rectangle as well)
Mod Podge (I'm using the gloss formula, which can be found here)
removable vinyl in your choice of color(s) (I am using four oh five brand removable vinyl in matte brown.)
transfer tape
paper cutter or scissors
mini charcuterie board designs (free to download when you sign up for the Mandy Creates Newsletter - find the link at the bottom of the page)
vinyl weeding tools
Standard grip cutting mat (If using the Cricut)
a vinyl cutting machine (I'm using the awesome Cricut Maker 3, found here)
*Note: Since I am using the Cricut Maker 3, I will also be using Cricut Design Space to get everything set up to cut.

Step1: First, we will open Cricut Design Space and import our image.
To do this, open the program and click on the "Canvas" tab at the top of the page. Then, click on "Upload" near the bottom of the left side menu.

Next, click on the green "Upload Image" button. At this point you are given the choice to browse for your image or drag the file into a gray square. Either method is fine, and they both accomplish the same thing. Choose your preferred method and attach your image to Design Space. make sure the file you choose is in an appropriate format (I recommend .svg).
Once your image has uploaded, click continue. The next page allows you to name your image, add any tags you may want to use for searching, and select a folder to save it in. make these choices as they apply to you and click upload. (The design will be automatically added to your canvas.)

As you can see, I am using the oh, so cute, Matthew 16-11 image. This image was done in 3 colors. The outer yellow circle is for sizing purposes only. However, you may choose to use it to trim away the excess vinyl around your cutout. I will explain more about this later.
Step 2: Resize the image for your mini charcuterie board.
Design space has the tendency to change sizes on uploaded images, so it is always good to double check the size of your image before you cut. The round portion of my board measures about 4.5 inches in diameter. Therefore, I will select all of the shapes involved and change the width and height to 4.5 inches.

Step 3: Now, it's time to decide if you want to use 2 colors for the final design or only one.
I'm thinking that this design will probably look better in one color. So, while keeping all the shapes selected, click "Attach" at the bottom right of the screen. This will turn everything the same color, but don't worry, it will still cut everything out! Over in your "Layers" panel on the left you will also note that there is now a paperclip with the word "Attach."
Attaching everything together in Design Space prevents it from spreading the different pieces out as it deems necessary to preserve material. Below is an example of what Design space does when you don't use attach versus when you do.
As you can see, "Attach" is a huge time and headache saver!
Step 4: Prepare your vinyl and position it on your cutting mat.
Cut your choice of vinyl to size and place it as straight as possible on your cutting mat.

Step 5: Click the "Make" button in the top right corner of design space and follow the remaining instructions to cut the image out. (After clicking "Make" you may be asked to save your project. This step is entirely optional, so do whatever you like here.)
Do NOT mirror the image. Select the vinyl choice that best describes the material you are using. For me, that is usually "Premium Vinyl", and it will be this time as well. Continue to follow the instructions to cut the image from the vinyl.
Step 6: Weed the vinyl.
This is where that outer circle comes in handy! Using your vinyl weeding tool, remove it first. You can then see your design more clearly, making it easier to weed. You can also trim just this section from your vinyl sheet so that you are working with a smaller piece, and you don't have to try to control the rest of the vinyl.
I like to use a lightboard behind my vinyl to more easily see where the cuts are and to distinguish which pieces to remove and which to keep. This is entirely optional, but you can find some great boards (like this one) on Amazon! (This is not the board I am using; I have had mine for several years and no longer have the link for it.)
I have shown two ways to weed this image below to get two different looks but will only be proceeding with one. The process for both is the same.

Step 7: Next, we will cut a piece of standard grip transfer tape to just larger than our image (say 5x5 inches). Remove the backing from the tape and cover your image with it. Using a brandishing tool, begin pressing the tape down, starting from the middle outward. Press in all directions until the tape is firmly secured to the cut vinyl.

Step 8: Carefully, lift the transfer tape and vinyl from the vinyl backing.
If any part of the vinyl does not lift off as you pull the tape, lay the tape back over that section again and re-brandish until it sticks.
Now, carefully place the tape with the vinyl, sticky side down, on to the charcuterie board. Keep the image centered and the top toward the handle of the board.
Brandish again, as in step 7, with the goal of making sure the vinyl is stuck fully to the board. Again, lift the tape slowly and gently making sure that you re-brandish any places that aren't free from the tape.
Step 9: Apply Mod Podge.
Stir the Mod Podge with a popsicle stick or plastic spoon. Using the sponge brush, apply a layer of Mod Podge over the vinyl. Be sure to keep it smooth and catch any drips. Once the first layer is dry, you may apply a second layer. Mod Podge is a relatively thin glue-like sealant. Apply as many layers as you feel you need to seal your vinyl (I applied 3 layers), but keep in mind that the more layers you apply, the more likely it is to show an added "thickness" in that area, so you may want to consider including the handle in your coverage. If including the handle, remove the cord first and replace once the Mod Podge is fully dry.

Step 10: Thats it! Your adorable mini fall charcuterie board is ready for hanging or gifting!

I hope you enjoy crafting these as much as I did! I would love to see your projects! Please, leave me photos of your pieces in the comments below, as well as any questions or suggestions you may have.
Have a blessed crafting time!


